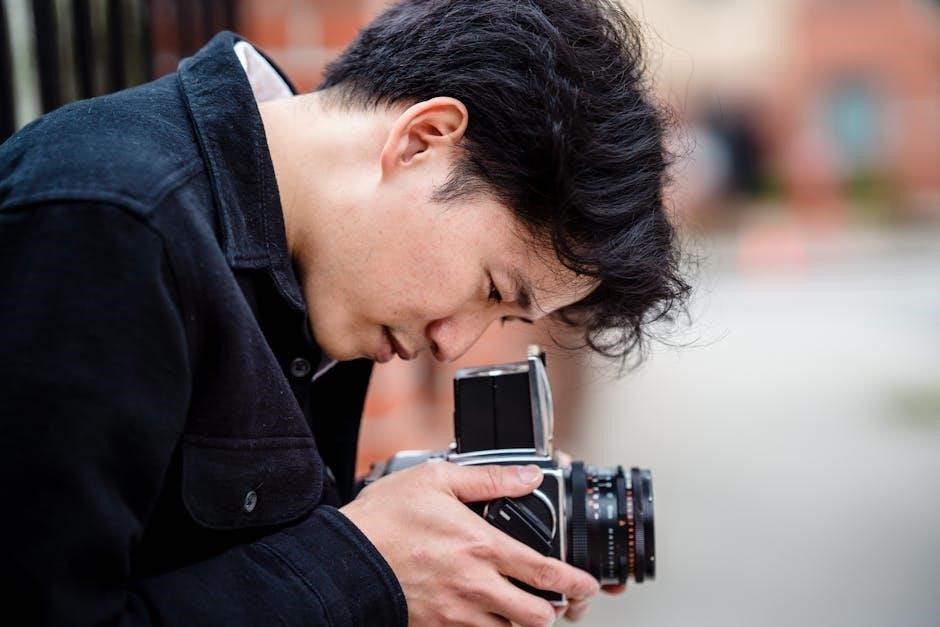
Understanding the Exposure Triangle
The Exposure Triangle combines aperture, shutter speed, and ISO to control light in photography. Each element works together to achieve optimal exposure and creative effects in images.
The Exposure Triangle is the foundation of photography, consisting of aperture, shutter speed, and ISO. Aperture regulates light entry through the lens, affecting depth of field. Shutter speed controls exposure duration, influencing motion capture. ISO adjusts the sensor’s light sensitivity, impacting noise levels. Together, these elements balance light and creative effects in images. Understanding their interplay is crucial for mastering photography. A chart simplifies this relationship, helping photographers visualize and adjust settings for optimal results in various lighting conditions. This introduction sets the stage for exploring each component’s role and how they harmonize to produce stunning, well-exposed photographs.
The Importance of the Exposure Triangle in Photography
The Exposure Triangle is fundamental in photography as it empowers photographers to control light and achieve desired creative effects. By mastering aperture, shutter speed, and ISO, photographers can balance exposure, depth of field, and motion blur. This understanding enhances image quality and consistency across varying lighting conditions. It also allows for artistic expression, enabling photographers to emphasize subjects or capture dynamic scenes effectively. The Exposure Triangle is essential for troubleshooting common issues like overexposure or noise. Its principles guide photographers in making informed decisions, ensuring optimal results in every shot. This foundational knowledge elevates photography from simple captures to deliberate, visually stunning creations.
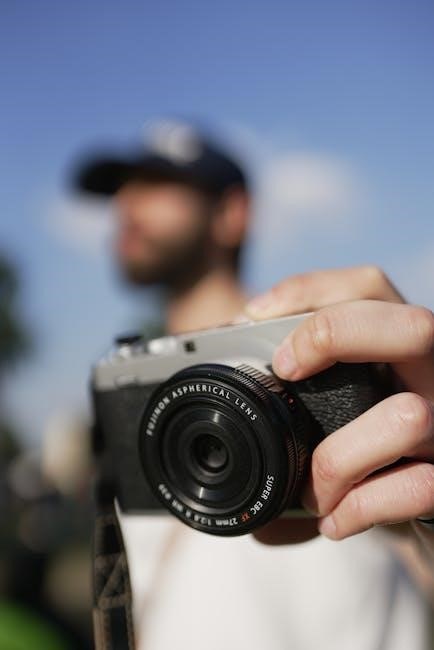
Aperture Explained
Aperture is a camera setting controlling light entry through the lens. It regulates depth of field, focusing sharpness on subjects while blurring backgrounds. Adjusting aperture enhances creativity in various lighting scenarios.
What is Aperture?
Aperture refers to the size of the camera lens opening, controlling how much light enters. Measured in f-stops (e.g., f/2.8 or f/16), it impacts exposure and depth of field. A lower f-stop value means a larger aperture, allowing more light and a shallower focus, while a higher f-stop results in a smaller opening, less light, and a deeper field. This fundamental setting is crucial for achieving desired effects in photography, such as isolating subjects or capturing landscapes with sharpness throughout.
F-Stop Values and Their Effects on Photography
F-stop values, such as f/2.8 or f/16, represent the size of the lens aperture. Lower f-stops (e.g., f/2.8) mean a larger aperture, allowing more light and creating a shallower depth of field, ideal for isolating subjects. Higher f-stops (e.g., f/16) result in a smaller aperture, less light, and a deeper depth of field, often used for landscapes. These values are crucial for controlling light intake and achieving desired visual effects in photos. Understanding f-stop progressions helps photographers make informed decisions for various shooting scenarios, balancing creativity with technical precision to capture the perfect image.
How Aperture Controls Light and Depth of Field
Aperture regulates light entry and depth of field by adjusting the lens opening. A larger aperture (lower f-stop) lets in more light and creates a shallow depth of field, blurring backgrounds. A smaller aperture (higher f-stop) allows less light and sharpens more of the image, ideal for landscapes. This balance between light control and focus area is vital for achieving desired effects. Properly using aperture enhances creativity in capturing subjects, ensuring both technical accuracy and artistic intent. By understanding aperture’s role, photographers can effectively manipulate light and focus to produce high-quality images tailored to their vision.
Shutter Speed Explained
Shutter speed is the duration the camera’s shutter remains open, measured in seconds or fractions thereof. It controls light exposure and motion blur in images.
What is Shutter Speed?
Shutter speed refers to the length of time the camera’s shutter is open during exposure, measured in seconds or fractions of a second. It is a critical component of the exposure triangle, alongside aperture and ISO. A faster shutter speed allows less light to enter, freezing motion and reducing blur, while a slower speed permits more light and creates motion blur. Understanding shutter speed is essential for capturing sharp images of moving subjects and achieving desired artistic effects. Proper use of shutter speed, combined with aperture and ISO, ensures well-balanced and visually appealing photographs in various lighting conditions.
Shutter Speed Measurements and Their Impact on Photos
Shutter speed is measured in seconds or fractions of a second, such as 1/100 or 1 second. Faster speeds (e.g;, 1/1000) freeze motion, reducing blur, while slower speeds (e.g., 1 second) create intentional blur, capturing movement. This measurement directly impacts the brightness and dynamic effect of an image. A chart combining aperture, shutter speed, and ISO helps photographers visualize how these elements interact. For instance, a slower shutter speed may require a smaller aperture or lower ISO to avoid overexposure. Balancing these measurements ensures proper exposure and desired artistic effects, making it a vital tool for mastering photography techniques in various lighting scenarios.
How Shutter Speed Affects Motion and Blur
Shutter speed determines the duration the camera’s shutter remains open, directly influencing motion and blur in photos. Faster speeds (e.g., 1/1000th of a second) freeze action, capturing sharp images of moving subjects. Slower speeds (e.g., 1 second) create motion blur, artistically depicting movement. This effect is often used to convey speed in sports or smoothness in waterfalls. A chart combining aperture, shutter speed, and ISO helps photographers predict and control these outcomes. Balancing these elements ensures desired effects, whether sharpness or artistic blur, making shutter speed a critical tool for achieving creative and technical goals in various photography scenarios. Proper adjustment enhances visual storytelling and impact in images.
ISO Explained
ISO determines a camera’s sensitivity to light, affecting image brightness and noise levels. Lower ISOs (e.g., 100) suit bright conditions, while higher ISOs (e.g., 6400) are used in low light.
What is ISO?
ISO refers to the International Organization for Standardization, but in photography, it’s a setting that controls the camera’s sensitivity to light. A lower ISO value, such as ISO 100, means the camera’s sensor is less sensitive, ideal for bright lighting conditions. Conversely, a higher ISO, like ISO 6400, increases sensitivity, useful in low-light situations. However, higher ISOs can introduce digital noise or grain in images. Understanding ISO is crucial for mastering exposure and achieving desired effects in various lighting environments. Proper ISO adjustment helps balance the exposure triangle alongside aperture and shutter speed, ensuring optimal image quality. This fundamental concept is essential for photographers of all levels.
How ISO Affects Light Sensitivity and Noise in Photos
ISO adjusts the camera sensor’s light sensitivity, impacting image brightness. Lower ISOs (e.g., ISO 100) are best for bright lighting, capturing sharp images with minimal noise. Higher ISOs (e.g., ISO 6400) amplify sensitivity, useful in low light but introducing digital noise, a grainy texture degrading image quality. Noise becomes more noticeable in shadows and uniform areas. Balancing ISO with aperture and shutter speed is essential for optimal results. Using the lowest necessary ISO minimizes noise, ensuring crisp, clean photos. This trade-off between light sensitivity and noise is a critical consideration in mastering the Exposure Triangle for professional-grade photography. Understanding this relationship helps photographers make informed decisions in various lighting conditions. Always prioritize the lowest ISO for the best image quality. This balance is key to achieving stunning, noise-free results. By adjusting ISO carefully, photographers can maintain clarity and detail in their work, even in challenging lighting scenarios. This fundamental aspect of photography ensures that images remain vibrant and professional, free from unwanted artifacts caused by high ISO settings. Proper ISO management is vital for capturing the desired aesthetic in every shot, making it a cornerstone of photographic technique and creativity. Balancing ISO with aperture and shutter speed ensures that light sensitivity and noise are effectively managed, resulting in images that meet the photographer’s artistic vision. This understanding empowers photographers to take control of their camera settings and produce consistently high-quality results. By mastering ISO, photographers can unlock the full potential of their equipment and create images that stand out in both technical excellence and artistic expression. This knowledge is essential for anyone seeking to elevate their photography skills and produce professional-grade work. Through careful ISO adjustment, photographers can achieve the perfect balance between light sensitivity and image clarity, ensuring that every photo is a testament to their skill and creativity. This makes ISO a powerful tool in the photographer’s arsenal, enabling them to adapt to any lighting situation and capture the world with precision and beauty. By understanding how ISO affects light sensitivity and noise, photographers can make informed decisions that enhance their craft and deliver exceptional results. This insight is invaluable for both beginners and seasoned professionals, as it directly impacts the quality and aesthetic of their photographs. With ISO mastery, photographers gain the confidence to experiment, innovate, and push the boundaries of their art, knowing they have the technical expertise to achieve their vision. This understanding of ISO’s role in the Exposure Triangle is a fundamental step toward photographic excellence and a lifelong journey of creative exploration. By grasping how ISO influences light sensitivity and noise, photographers can harness its power to create images that inspire, tell stories, and leave a lasting impression. This knowledge is a cornerstone of photography education and a key factor in producing work that resonates with viewers on a deeper level. Through the thoughtful application of ISO settings, photographers can transform ordinary moments into extraordinary images, capturing the essence of their subjects with clarity and emotion. This is the true power of ISO in the world of photography, and it is a lesson that every photographer must learn to fully realize their artistic potential. By mastering ISO, photographers can overcome the challenges of varying light conditions and consistently deliver high-quality, visually stunning photographs that reflect their unique perspective and style. This is the essence of photographic mastery, and it begins with a deep understanding of how ISO affects light sensitivity and noise in photos. With this knowledge, photographers can embark on a journey of continuous improvement, always striving to create images that exceed expectations and touch the hearts of those who view them. This is the legacy of ISO in photography, a testament to the enduring pursuit of excellence in the art form. By embracing the power of ISO, photographers can unlock new creative possibilities and bring their vision to life with unparalleled precision and beauty. This is the ultimate goal of understanding ISO’s role in the Exposure Triangle, and it is a journey that every photographer should undertake to reach new heights in their craft. With ISO mastery, the possibilities are endless, and the art of photography becomes a limitless canvas waiting to be explored and expressed through the lens of a skilled photographer. This is the true spirit of photography, and it is fueled by the profound understanding of ISO and its impact on light sensitivity and noise in photos. By mastering this fundamental aspect, photographers can achieve greatness and leave an indelible mark on the world of photography. This is the power of ISO, and it is a force that every photographer should harness to create images that inspire, educate, and delight audiences worldwide. Through the careful balance of ISO, aperture, and shutter speed, photographers can create works of art that transcend time and touch the human experience in profound ways. This is the magic of photography, and it begins with the mastery of ISO and its effects on light sensitivity and noise in photos. By understanding and applying this knowledge, photographers can unlock the full potential of their cameras and produce images that are not only technically excellent but also emotionally resonant and visually compelling. This is the ultimate reward of learning how ISO affects light sensitivity and noise in photos, and it is a lesson that every photographer should cherish and apply in their pursuit of photographic excellence. With ISO mastery, the boundaries of creativity expand, and the possibilities for artistic expression become limitless, allowing photographers to capture the world in ways that were previously unimaginable. This is the true power of ISO, and it is a key component in the never-ending quest to create photographs that inspire and uplift. By grasping the fundamentals of ISO and its impact on light sensitivity and noise, photographers can take their skills to new heights and produce work that is truly extraordinary. This is the essence of photography, and it is a journey that begins with the understanding of ISO and its role in the Exposure Triangle. Through dedication and practice, photographers can master ISO and unlock the secrets of creating stunning, professional-grade images that leave a lasting impression. This is the legacy of ISO in photography, and it is a testament to the enduring power of this fundamental concept in the world of photographic art. By embracing the power of ISO, photographers can achieve greatness and create images that will be remembered for generations to come. This is the true spirit of photography, and it is fueled by the profound understanding of ISO and its effects on light sensitivity and noise in photos. With this knowledge, photographers can overcome any challenge and produce work that is nothing short of extraordinary, a true reflection of their skill and artistic vision. This is the ultimate goal of mastering ISO, and it is a journey that every photographer should embark upon to reach new heights in their craft. Through the careful application of ISO settings, photographers can transform ordinary moments into extraordinary images, capturing the essence of their subjects with clarity and emotion. This is the true power of ISO in the world of photography, and it is a lesson that every photographer must learn to fully realize their artistic potential. By mastering ISO, photographers can overcome the challenges of varying light conditions and consistently deliver high-quality, visually stunning photographs that reflect their unique perspective and style. This is the essence of photographic mastery, and it begins with a deep understanding of how ISO affects light sensitivity and noise in photos. With this knowledge, photographers can embark on a journey of continuous improvement, always striving to create images that exceed expectations and touch the hearts of those who view them. This is the legacy of ISO in photography, a testament to the enduring pursuit of excellence in the art form. By embracing the power of ISO, photographers can unlock new creative possibilities and bring their vision to life with unparalleled precision and beauty. This is the ultimate goal of understanding ISO’s role in the Exposure Triangle, and it is a journey that every photographer should undertake to reach new heights in their craft. With ISO mastery, the boundaries of creativity expand, and the possibilities for artistic expression become limitless, allowing photographers to capture the world in ways that were previously unimaginable. This is the true power of ISO, and it is a key component in the never-ending quest to create photographs that inspire and uplift. By grasping the fundamentals of ISO and its impact on light sensitivity and noise, photographers can take their skills to new heights and produce work that is truly extraordinary. This is the essence of photography, and it is a journey that begins with the understanding of ISO and its role in the Exposure Triangle. Through dedication and practice, photographers can master ISO and unlock the secrets of creating stunning, professional-grade images that leave a lasting impression. This is the legacy of ISO in photography, and it is a testament to the enduring power of this fundamental concept in the world of photographic art. By embracing the power of ISO, photographers can achieve greatness and create images that will be remembered for generations to come. This is the true spirit of photography, and it is fueled by the profound understanding of ISO and its effects on light sensitivity and noise in photos. With this knowledge, photographers can overcome any challenge and produce work that
Best Practices for Using ISO in Different Lighting Conditions
Using the right ISO in various lighting conditions ensures optimal image quality. In bright light, use lower ISOs (ISO 100-400) to minimize noise and capture sharp details. In low-light scenarios, higher ISOs (ISO 800-6400) are necessary to brighten the image, but be cautious of noise. Always prioritize the lowest ISO possible for the lighting to reduce grain. Adjust ISO gradually, testing its impact on noise and brightness. Refer to an aperture, shutter speed, and ISO chart to find the ideal balance for your scene. This approach helps maintain image clarity and detail, ensuring professional results in any lighting environment. Proper ISO adjustment is crucial for achieving desired aesthetic and technical quality in photography.
Relationship Between Aperture, Shutter Speed, and ISO
Aperture, shutter speed, and ISO work together to control light exposure. Adjusting one affects the others, requiring balance for optimal image results and desired effects.
How Aperture, Shutter Speed, and ISO Work Together
Aperture, shutter speed, and ISO are interconnected elements that regulate light exposure in photography. Aperture controls the amount of light entering the lens, while shutter speed determines how long the camera’s shutter stays open. ISO adjusts the camera’s sensitivity to light. Together, they balance the exposure, ensuring properly lit images. When one is adjusted, the others must compensate to maintain the desired effect. For example, a larger aperture (smaller f-stop) allows more light, requiring faster shutter speeds or lower ISO for balance. Understanding their synergy is crucial for achieving creative control over lighting, depth of field, and motion in photographs.
Balancing the Exposure Triangle for Optimal Results
Balancing aperture, shutter speed, and ISO is essential for achieving optimal results in photography. Each element influences the others, requiring careful adjustment to avoid overexposure or underexposure. For instance, a wide aperture (like f/2.8) allows more light, so a faster shutter speed or lower ISO may be needed to prevent blown highlights. Conversely, in low-light conditions, increasing ISO or slowing shutter speed can compensate for a narrower aperture; Experimentation and understanding how these elements interplay help photographers achieve desired effects, such as freezing motion with fast shutter speeds or creating bokeh with a wide aperture, while maintaining proper exposure levels in various lighting scenarios.
Common Scenarios and Adjustments
Common scenarios in photography require specific adjustments to the Exposure Triangle. For portraits, a wide aperture (low f-stop) isolates subjects, while a slower shutter speed can create motion blur in action shots. In landscapes, a narrow aperture (high f-stop) ensures depth, paired with a tripod for stability due to slower shutter speeds. Low-light conditions often demand higher ISOs, but balancing with a wide aperture or slower shutter speed minimizes noise. Understanding these adjustments helps photographers adapt to various situations, ensuring optimal image quality and creative control, whether capturing sharp details or artistic effects in diverse lighting environments and subject matters. Proper use of aperture, shutter speed, and ISO charts aids in making precise adjustments for desired outcomes.
Using an Aperture, Shutter Speed, and ISO Chart
An aperture, shutter speed, and ISO chart is a visual tool that helps photographers understand and balance these elements for optimal exposure in various lighting conditions.
What is an Aperture, Shutter Speed, and ISO Chart?
An aperture, shutter speed, and ISO chart is a visual tool that organizes the relationships between these three fundamental photography elements. It displays f-stop, shutter speed, and ISO values in a structured format, helping photographers understand how they interact to achieve proper exposure. The chart often includes progressions like f/2.8, f/4, f/5.6, and shutter speeds from seconds to fractions of a second. By visually mapping these elements, the chart simplifies the process of balancing light intake and creative effects. It is particularly useful for educators and learners, as it provides a clear, at-a-glance reference for mastering the exposure triangle. This resource is widely available in PDF formats for easy printing and use.
How to Read and Interpret the Chart
To read an aperture, shutter speed, and ISO chart, start by identifying the three axes or sections dedicated to each element. Aperture is typically represented in f-stops, shutter speed in seconds or fractions, and ISO in numerical values. The chart often shows how these elements interrelate, allowing you to adjust one while balancing the others for proper exposure. For example, increasing the aperture (lower f-stop) may require reducing shutter speed or increasing ISO. The chart simplifies understanding the exposure triangle by visually mapping these relationships, enabling photographers to make informed decisions quickly. This structured approach helps in achieving desired effects like depth of field or motion blur.
Practical Applications of the Chart in Photography
An aperture, shutter speed, and ISO chart is a valuable tool for photographers, offering practical guidance in various shooting scenarios. It helps determine the ideal settings for portraits, landscapes, or action shots by visually linking aperture, shutter speed, and ISO. For instance, in low-light conditions, the chart can suggest increasing ISO or using a larger aperture. In bright settings, it might recommend a smaller aperture or faster shutter speed. The chart also aids in achieving creative effects, such as motion blur or depth of field, by showing how adjustments impact the image. This makes it an essential resource for both amateurs and professionals aiming to refine their techniques and capture stunning photos consistently.
Creating a Custom Aperture, Shutter Speed, and ISO Chart
A custom chart allows photographers to tailor settings to specific needs, ensuring optimal exposure and creative control in various lighting conditions and scenarios.
Why You Might Need a Custom Chart
A custom aperture, shutter speed, and ISO chart is ideal for photographers seeking personalized control over their settings.Generic charts may not cater to specific needs, such as unique lighting conditions or specialized photography genres. By creating a tailored chart, photographers can better visualize and adjust settings for consistent results. This tool is especially useful for understanding how aperture, shutter speed, and ISO interact in various scenarios, ensuring optimal exposure and creative control. A custom chart also helps in streamlining the workflow, making it easier to adapt to different environments and achieve desired effects efficiently.
Steps to Create a Personalized Chart
To create a personalized aperture, shutter speed, and ISO chart, start by determining your photography goals and the specific lighting conditions you often work with. Next, gather data on standard aperture, shutter speed, and ISO ranges. Use spreadsheet software to organize this information into a table. Include columns for f-stop values, shutter speed measurements, and ISO settings, along with notes on their effects. Customize the chart by highlighting common combinations you use frequently. Finally, save and print the chart for easy reference during shoots. This tailored approach ensures the chart meets your unique needs and enhances your workflow efficiency.
Tools and Resources for Designing Your Chart
Designing a personalized aperture, shutter speed, and ISO chart can be streamlined with the right tools. Spreadsheet software like Excel or Google Sheets is ideal for organizing data into tables. Graphic design tools such as Canva or Adobe Illustrator can help create visually appealing layouts. Online templates for aperture, shutter speed, and ISO charts are widely available and can be customized to suit your needs. Additionally, photography websites and forums offer downloadable PDF templates and tutorials to guide you through the process. These resources enable you to create a chart that is both functional and easy to reference, ensuring you can quickly adjust settings during shoots.

Best Practices for Using the Chart
Use the chart to balance aperture, shutter speed, and ISO for optimal exposure. Practice regularly to master the Exposure Triangle and enhance your photography skills effectively.
How to Apply the Chart in Real-World Photography
Begin by assessing lighting conditions and desired effects. Refer to the chart to select suitable aperture, shutter speed, and ISO combinations. For portraits, use a wide aperture (low f-stop) to blur backgrounds. In low light, increase ISO cautiously to avoid noise. When capturing motion, adjust shutter speed—faster speeds freeze action, while slower speeds create blur. Experiment with different settings to understand how each element impacts the image. Practice consistently to develop intuition and master the Exposure Triangle. This approach ensures well-balanced exposures and helps achieve creative vision in various photography scenarios.
Tips for Mastering the Exposure Triangle
Start by experimenting with one element at a time to understand its impact. Use a aperture, shutter speed, and ISO chart to visualize relationships. Shoot in manual mode to gain full control. Pay attention to lighting changes and adjust settings accordingly. Review images on a larger screen to spot nuances. Practice regularly to build muscle memory. Study the work of other photographers to learn new techniques. Finally, stay patient and persistent, as mastering the Exposure Triangle takes time and practice.
Common Mistakes to Avoid When Using the Chart
One common mistake is ignoring the reciprocal relationship between aperture and shutter speed. Overlooking ISO adjustments in low-light conditions can lead to noisy images. Relying too much on the chart without understanding the underlying principles can hinder creative control. Neglecting to account for motion and depth of field when adjusting settings often results in unintended blur or focus issues. Additionally, not regularly reviewing and updating the chart for different scenarios can limit its effectiveness. Always cross-check settings with the chart to ensure proper exposure and desired visual effects in your photography.
Resources for Further Learning
Explore books like Understanding Exposure and online courses on platforms like Udemy. Join photography forums such as 500px for shared knowledge and resources, including PDF charts.
Recommended Books and Guides
For in-depth learning, consider books like Understanding Exposure by Bryan Peterson, which simplifies aperture, shutter speed, and ISO concepts. The Photographer’s Eye by Michael Freeman offers insights into composition and exposure. Additionally, downloadable PDF guides on aperture, shutter speed, and ISO charts provide visual aids for mastering the Exposure Triangle. These resources are ideal for photographers seeking structured learning and practical examples to enhance their skills. They complement online tutorials and forums, offering a comprehensive understanding of photography fundamentals.
Online Courses and Tutorials
Platforms like Udemy and Coursera offer courses that break down the Exposure Triangle into aperture, shutter speed, and ISO. Tutorials on YouTube and Skillshare provide hands-on lessons, while PDF charts serve as quick reference guides. These resources help photographers grasp how to balance settings for optimal results. Interactive modules and downloadable materials make learning engaging and accessible. Whether you’re a beginner or advanced shooter, these courses and tutorials offer valuable insights to master aperture, shutter speed, and ISO, ensuring better control over your photography. They are ideal for those seeking flexible, self-paced learning opportunities.
Communities and Forums for Photography Enthusiasts
Photography communities and forums, such as 500px and Reddit’s r/photography, provide a space for enthusiasts to share knowledge and experiences. Members often discuss the Exposure Triangle and how to use charts effectively. These forums allow photographers to seek advice, showcase work, and learn from others. They also offer resources like aperture, shutter speed, and ISO charts in PDF formats, helping members improve their skills. Engaging with these communities fosters growth and collaboration, making them invaluable for photographers of all levels. Active participation can enhance your understanding of the Exposure Triangle and refine your techniques through shared insights and feedback.